#3.3. Discover Devices
Zenoss' network discovery process iterates through every IP address in the sub-network ranges you specify, adding each device that responds to a ping request. Further, any device that responds to an SNMP request will have additional information added to it.
Note
To perform discovery, the machine on which Zenoss is installed must have an SNMP agent running.
To add all of the devices on a sub-network to Zenoss:
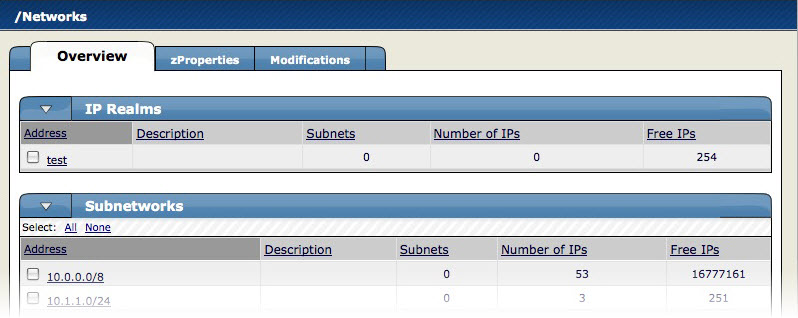
From the Navigation menu, select Networks.
The Networks page appears, displaying all of the currently configured sub-networks.
Note
If the sub-network that you want to scan does not appear, then select Add Network from the Subnetworks table menu, and then supply the sub-network IP address and subnet mask (for example, 192.168.1.0/24).
Select one or more sub-networks that you want to scan for devices.
Open the Subnetworks table menu, and then select Discover Devices.
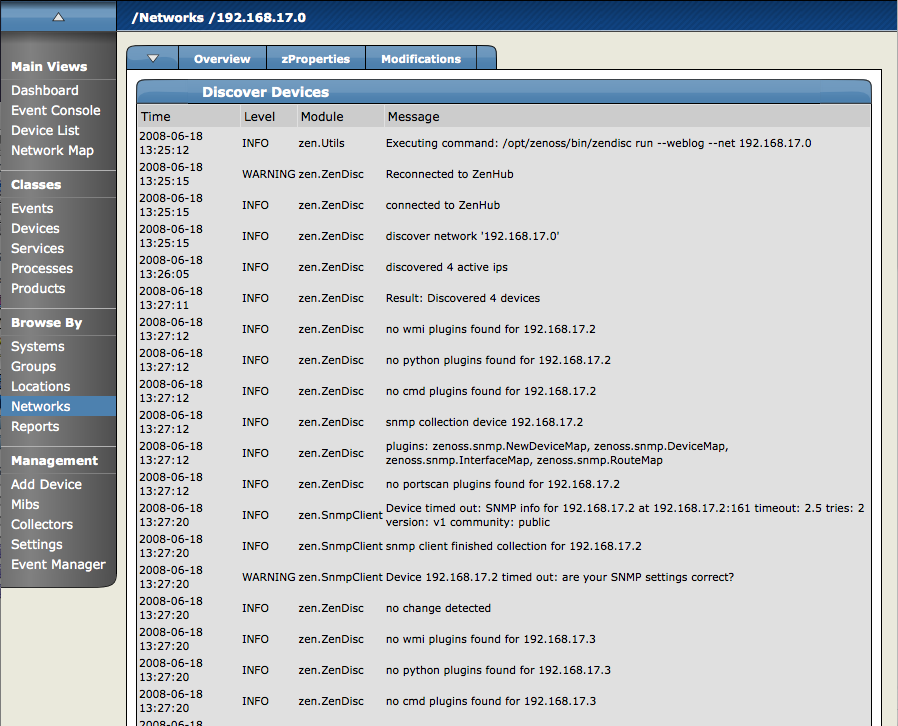
The Discover Device page appears. This page shows the status of all the device collections in progress. (Do not navigate away from this page during discovery.)
Zenoss first models the monitoring machine, and then walks through the routing tables of all routers it locates. Discovery continues while valid SNMP access is found or until a network is discovered in the DMD that has its zAutoDiscover property set to False.
Zenoss places routers discovered through this process in the device path /Network/Router. Devices are placed in the /Discovered device class.
#3.3.1. Discover Devices - Alternate Method
You also can use the "easy add" facility to discover devices. From the Add Device page, click "Easy Add" (located at the top right of the page). For information and instructions to help you discover devices this way, refer to the section titled "Add Devices" in Zenoss Getting Started.
#3.3.2. Classifying Discovered Devices
Once discovery is complete, you must move discovered devices (placed, by default, in the /Discovered class) to an appropriate device class in the hierarchy. Moving devices to their correct hierarchy location initiates the monitoring process.
In general, servers are organized by operating system. If Zenoss discovers Windows devices, for example, you might choose to relocate them to /Server/Windows/WMI. Similarly, you might choose to classify discovered Linux devices in the /Server/Linux device class.
To classify discovered devices:
Select one or more discovered devices in the device list.
From the page menu, select Set to Class.
In the Edit Device Class dialog, select a device class.
Click Move.
#3.3.3. Authenticating Devices
For each device that is added to the Zenoss database and set to its proper device class, Zenoss may require authentication information before it can gather device information and monitor the device.
For example, for a device in the /Server/Windows/WMI class, you must supply your Windows user name and password before Zenoss can monitor the device. To do this:
Navigate to the device in the device list.
From the page menu, select More > zProperties.
Set the user name and password values in the zWinUser and zWinPassword zProperties.
Click Save.
Similarly, for a device in the /Server/SSH/GenericLinux class, you must supply your SSH user name and password. Set these values in the device's zCommandUsername and zCommandPassword zProperties.
#3.3.4. Adding Information to a Device Record
You may want to add details about a discovered device, such as its Business System or Location. To add information, select the device in the list, and then go to the Edit tab.
