#2. Managing Devices and Device Attributes
Read the information and procedures in this section to learn how to manage devices in Zenoss.
#2.1. Managing Custom Device Properties
You can use the Custom Properties page to create an unlimited number of custom commands. Custom commands are defined at the root level of the device tree and apply to all devices.
To access the Custom Properties page, open the Device page menu, and then select More > Custom.

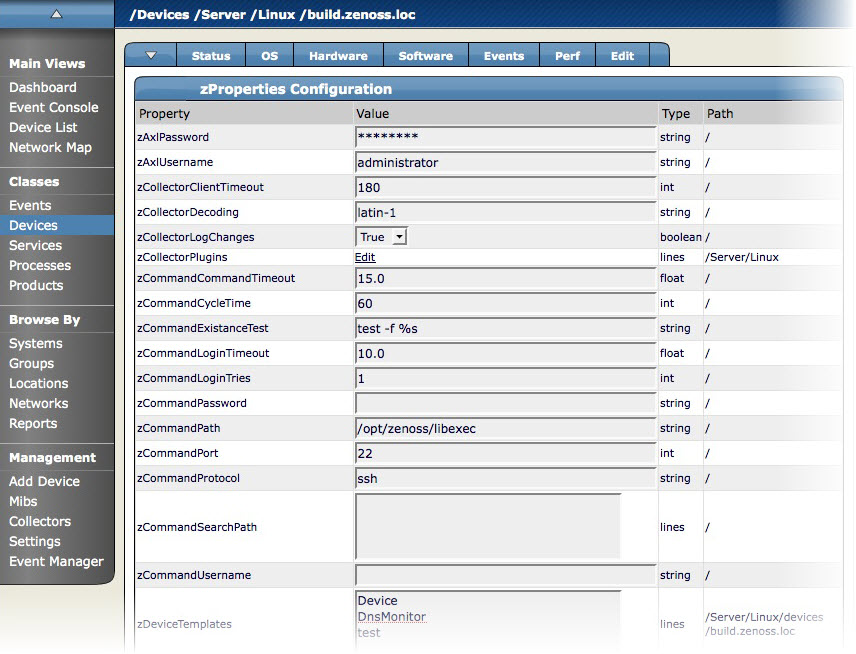
#2.2. Managing Device zProperties
From the Device zProperties page, you can configure zProperties for devices.
Note
For detailed information about working with zProperties, see the chapter titled "Properties and Templates."
To configure zProperties for multiple devices, click the zProperties tab from the Device Overview tab. To configure zProperties for an individual device, click the device name in the Device Overview, and then click the zProperties tab for that device.
To access the zProperties, open the device table menu, and then select More > zProperties.
#2.3. Managing Device Templates
The Templates page shows all of the performance templates bound by name to this device or group of devices. To access templates, open the Device table menu, and then select More > Templates.
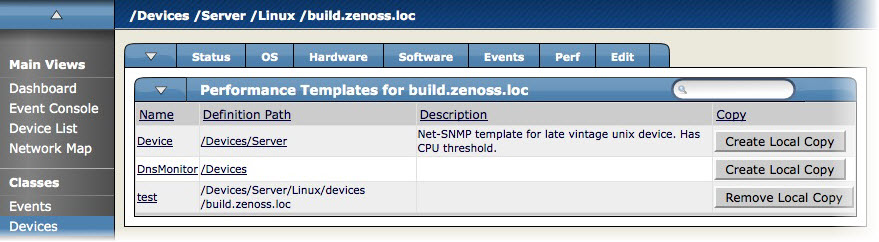
For detailed information about performance templates, go to the section titled "Performance Monitoring."
#2.4. Determining Device Administration
Use the Device Administration page to define commands and specify who holds administration capabilities for the device.
To access the Administration page, open the Device page menu, and then select More > Administration.
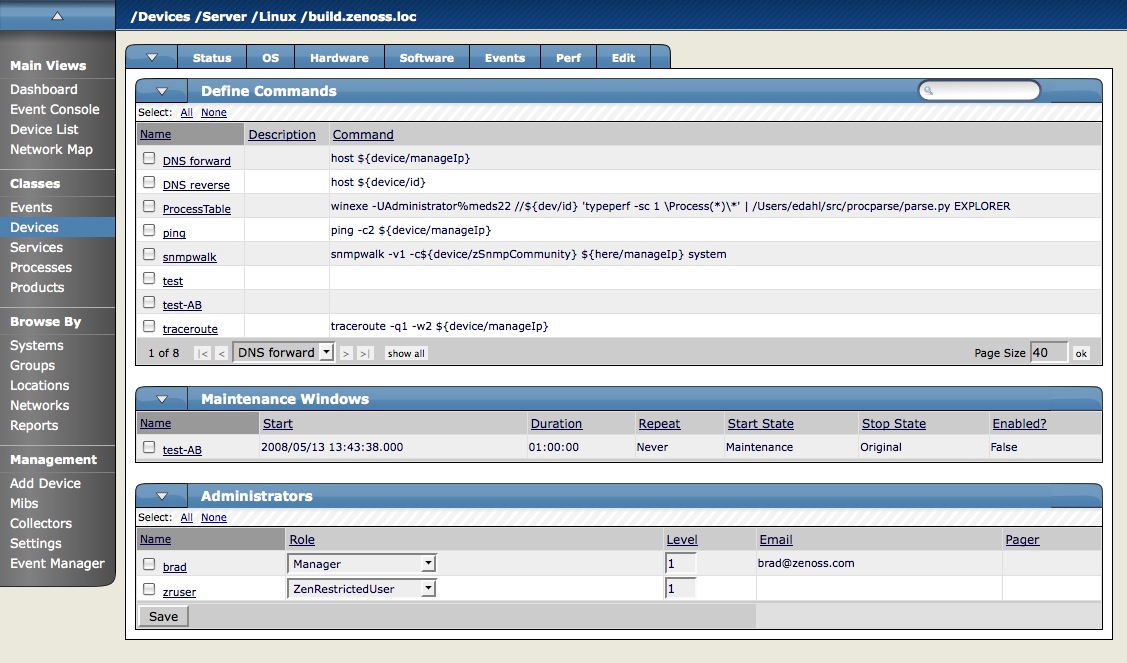
If you are using Zenoss Core, the Administrators area is informational only. Use this area to define administrators for this device, and to specify their assigned roles.
#2.5. Clearing Heartbeats
If you have configured a device to send a recurring event that you have mapped to a heartbeat class in Zenoss, you can clear stale heartbeat events.
To clear the heartbeats associated with a device:
Navigate to the device.
From the Device page menu, select Manage > Clear Heartbeats.
Zenoss moves the heartbeats for the device to event history. The Edit tab for the ZenEventManager appears. Optionally make changes, and then click Save.
#2.6. Pushing Configuration Changes to Zenoss
When you make a configuration change in Zenoss, the change is automatically propagated to all the remote collectors. If you think that your change has not been propagated automatically, then you can manually force a configuration "push" to the collectors.
To push configuration changes:
Navigate to the device.
From the Device page menu, select Manage > Push Changes.
A status message appears at the upper right of the page, confirming that changes have been pushed to the collectors.
#2.7. Locking Device Configuration
You can lock a device's configuration to prevent changes from being overwritten when remodeling the device. Two levels of locking are available. You can lock the configuration from deletion and updates, or solely from deletion.
Note
Device locking prevents changes and deletion due to remodeling. It does not prevent manual changes and deletion.
To lock a device configuration:
Navigate to the device.
From the Device page menu, select Manage > Lock.
The Edit Lock dialog appears.
To send events when actions are blocked by a lock action, select the "Send event..." option.
Select the type of lock you want to implement, or select Unlock to unlock the device configuration currently set.
The lock or unlock action is implemented on the device.

#2.8. Renaming a Device
Because Zenoss uses the manage IP to monitor a device, the device name may be different than its fully qualified domain name (FQDN). The device name must always be unique within Zenoss.
To rename a device in Zenoss:
Navigate to the device.
From the Device page menu, select Manage > Rename Device.
The Rename Device dialog appears.
In the ID field, enter the new name for the device.
Click OK.
The device is renamed in Zenoss.
#2.9. Remodeling a Device
Remodeling forces Zenoss to re-collect all configuration information associated with a device. Normally, Zenoss models devices every 720 minutes; however, if you want to remodel a device immediately, follow these steps:
Navigate to the device.
From the Device page menu, select Manage > Model Device.
The device is remodeled, and the remodeling status page appears.
#2.10. Resetting the Device Manage IP Address
You might want to reset the manage IP address if the IP address of a device has changed and you want to maintain the historical data at the original IP address. To reset the manage IP address of a device in Zenoss:
Navigate to the device.
From the Device page menu, select Manage > Reset IP.
The Reset IP dialog appears.
Enter the new IP address for the device, or leave the field blank to allow the IP address to be set by DNS.
Click OK.
The IP address for the device is reset.

#2.11. Resetting the Device Community
If Zenoss is unable to monitor a device because its SNMP community has changed, you can re-discover the device community by using the list of community strings defined in the zSnmpCommunity zProperty.
Navigate to the device.
From the Device page menu, select Manage > Reset Community.
The community for the device is reset.
#2.12. Selecting Device Collector Plugins
The Collector Plugins page lists all of the plugins available for a device.
To access collector plugins:
Navigate to the device.
From the Device page menu, select More > Collector Plugins.

#2.13. Deleting a Device from Zenoss
To delete a device from Zenoss:
Navigate to the device.
From the Device page menu, select Manage > Delete Device.
The Delete Device dialog appears.
Click OK to confirm deletion.
#2.14. Managing Multiple Devices from the Device List
You can perform many management tasks for more than one device at a time. Make selections from the Device list page menu to manage multiple devices. Select devices in the list (check the box next to each one you want to select), and then select an option from the menu.
When managing multiple devices, you can:
Move devices to new classes
Assign devices to groups, systems, and locations
Assign monitors for collecting from selected devices
Remove devices from Zenoss
Provide configuration locks for devices
#2.15. Dumping and Loading Devices Using XML Lists
Zenoss allows you to export a list of your devices to an XML file to import into another Zenoss instance. From the command line, use the command:
zendevicedump -o mydevicelist.xml
This command writes the names of your devices (including their device classes, groups, systems) to a file named mydevicelist.xml.
To load these devices into another Zenoss instance (or reload them into the same instance), while in the Zenoss instance where you want the devices to be discovered, run the command:
zendeviceload -i mydevicelist.xml
Zenoss attempts to discover each of the devices in the XML file.
